This chapter describes how objects can be used and connected to one another.
Contents
To add an object from the toolbox, simply drag the desired object from the toolbox to any position in the modeling interface (see Figure 1).
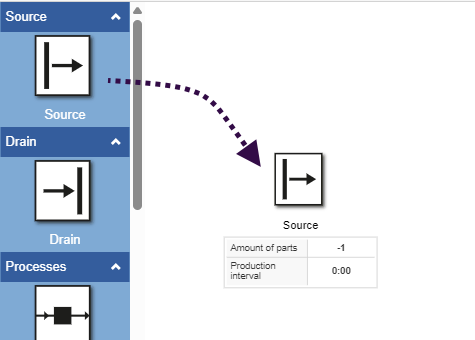
Figure 1 - Adding Objects
Clicking on the object’s connection points displays possible object suggestions calculated by the algorithm.
The number of suggestions can be set in the app settings (global) under 2.9 Number of suggested items.
Probabilities are displayed for each suggested object. Clicking on the respective object automatically connects it to the original object in the modeling interface.
The position of the suggestions displayed for a new object depends on which connection point was selected in the original object.
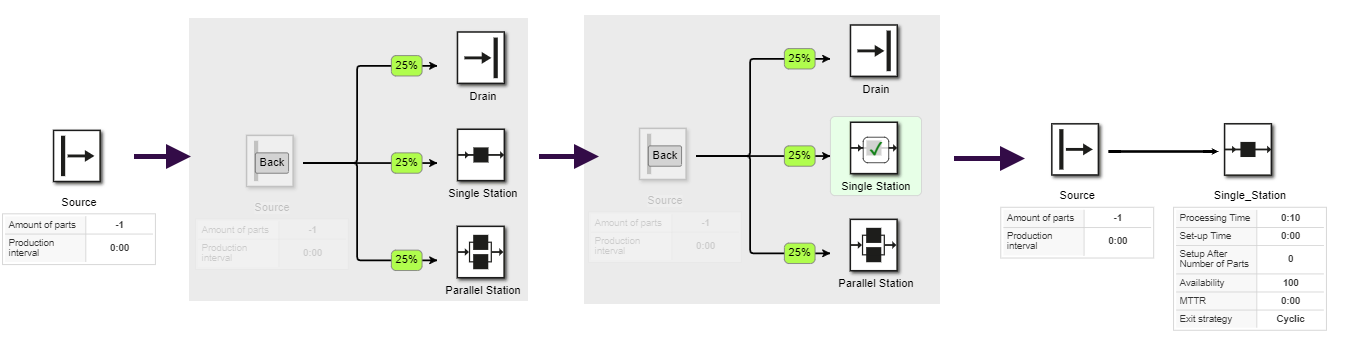
Figure 2 - Suggested Objects
To copy an existing object, first select the desired object with the mouse. The selected object can then be copied and pasted using one of the following options:
•Using the keyboard shortcuts [CTRL] + C and [CTRL] + V
•By clicking on the desired object, holding down the [CTRL] key, and dragging the object to a different location
•Copying and pasting objects is also possible between multiple versions of the same project
To select an object, simply click on it with the mouse. You can also select multiple objects by holding down the [CTRL] key.
By holding down the mouse button for a longer time (“long-click”), you can draw a frame to select multiple objects (see Figure 3).
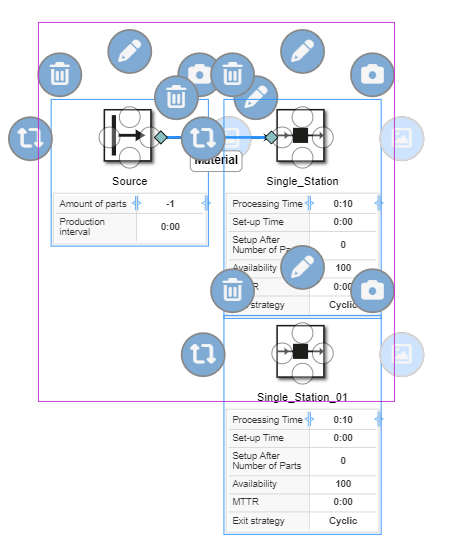
Figure 3 - Rectangle to select multiple objects
Objects can be connected to one another using connection lines. Each object in the toolbox has four possible connection points, marked by a circle (see Figure 4).
Click and hold the left mouse button to create a connection to another object. The connection automatically snaps to one of the four possible connection points on the target object.
The possible connections for an object are indicated in the modeling interface by a green frame.
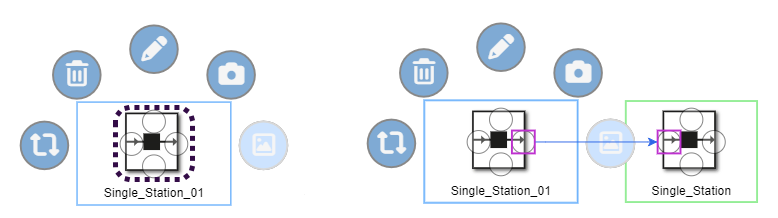
Figure 4 - Connecting Objects
Using the |
|
icon, you can configure the parameters for all available objects. The options vary depending on the object. Details on the individual parameters can be found in the respective chapter for the object |

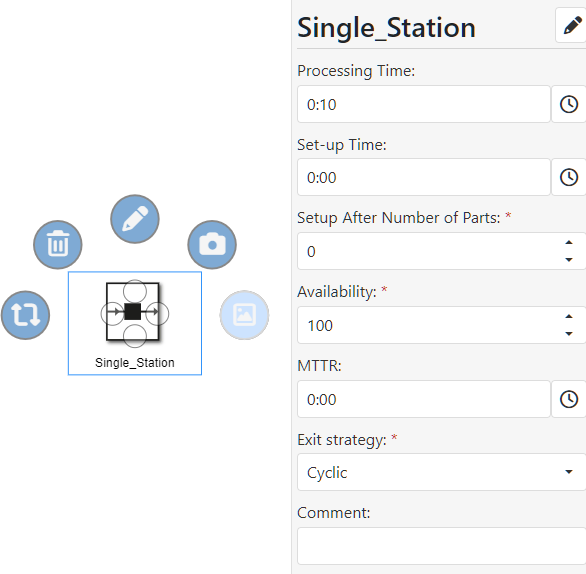
Figure 5 - Editing Data
© SimPlan AG - Hanau District Court, Commercial Register (Part B) 6845 - info@simplan.de - www.simplan.de/en